Showing posts with label DIY. Show all posts

Monday, June 8, 2015

 Reutiliza unas puertas viejas

¡Hola! Decidí volver a escribir en este blog abandonado. Espero que Sandra regrese también, pero se que tengo que hacerlo yo primero para que me crea y se anime.
Empecé a bordar hace unos meses y descubrí que es algo que me gusta bastante, tanto como para tratar de convertirlo en algo más que un hobby. He estado haciendo algunas piezas y collares que metí a la tienda (Celoffán). Pero pronto me encontré con un problema, no sabía como ponerlos para que se viera bien mi espacio. Era un producto distinto y necesitaba un display diferente. Entonces se me ocurrió: ¡unas puertas de cantina viejas!


 Lo que necesitas son unas puertas viejas, unas lijas, bisagras con sus respectivos tornillos, un desarmador y tiempo (yo me tardé unas horas). Lo que hice fue darle un efecto "tipo country, tipo playa" mejor conocido como deslavado o envejecido. Sólo lijé algunas partes para que se viera en algunas partes la madera. Fue horrible, odio lijar.


 Luego les pones unas bonitas bisagras, y el resultado es algo parecido a esto:


Me gustó el resultado, les puse unos ganchitos para colgar los collares y unos clavitos para los bordados. Se me ocurre que podrían servir también para colgar plantas o en la cocina ¿por qué no?

Lamento las fotos tan terribles, espero a alguien le sirva de inspiración o algo.

Ahí luego :3

- C


Wednesday, September 4, 2013

DIY: Chevron Tape - Cinta Chevron


¿No aman las cintas que tienen dibujitos y decoraciones o son de colores? Claro que las aman ¿Quién no las ama? En el laboratorio donde trabajaba mi novio tenían unas cintas color pastel para etiquetar sus tubos de muestras y esas cosas y nunca me quiso regalar una porque eran "caras y especiales y del laboratorio" pfffttt.... pues no sé, pero son difíciles de encontrar, por lo menos en donde yo vivo y cuando las he visto son muy caras.

Así que el otro día que grabe un pequeño video y necesitaba que pegar algo y no tenía ninguna cinta bonita (lo mismo me pasa cada navidad y la cinta transparente es tan... predecible jaja), decidí tomar un masking tape común y corriente y ponerle chevron con un sharpie, me tardé como un minuto y todo lo que pegué se veía 400% mejor (esa cifra es convincente), también se puede hacer de varios colores (por fin encontré un uso para todos los sharpies color pastel que no sirven para marcar nada, porque siempre que quieres marcar algo es oscuro), un arcoíris, rayas, lo que sea y ni siquiera tiene que quedar perfecto porque se ve bonito que todas las rayas sean un poquito diferentes. 

Don't you just love pretty tape? With decorations or fancy colors, of course you do. Who wouldn't
My boyfriend used to have pastel colored tapes to label his test tubes in the lab, and he would never give me any because it was "expensive, and special and lab property" pffft... anyway, I can never find anything like that in the real world and whenever I do they're super expensive.

So, the other day I was filming a little video and I wanted to tape something to a notebook, but I didn't want to use my boring old tape (I have this dilemma every christmas because I'm not convinced see-through tape is the way to go), and I decided to take my masking tape and paint chevron lines with sharpie. That's right, I can do anything now, rainbows, drawings, stripes, whatever, I've finally found a use for pastel colored sharpies too - because let's be honest whenever you have to use a sharpie is always on a dark surface - so yeah, this was awesome because everything I taped looked 400% better, and that's a great average. Also, the lines don't have to be even, it looks quirky and cute when they're not ;)


DIY super mega express ;) 
Have a great wednesday!
¡Que tengan bonito miércoles!

-S

Monday, July 1, 2013

Hallazgos

Favorite findings: cosas que quiero probar


1.- Embroidered headphones. I will love to try this, they look super pretty <3
Audífonos bordados. Necesito unos audífonos y ahora que veo esto sé que necesito bordarlos.


2.- I really like this idea, I think it would be perfect for keeping your favorite books next to your bed.
Me encanta esta idea. Sobre todo para libros y tal vez en blanco y negro o en dos colores contrastantes.


3.- I´ve been meaning to make a cake like this for a long time...will this be the month that I finally get to make an ombre cake? (hope so...)
Llevo queriendo hacer un pastel así desde hace muchísimo. Espero que éste mes lo logre por fin, realmente no se porque no lo he hecho aún si es hermoso.


4.- I need a packing as awesome as this for my cupcakes <3_<3
Necesito un empaque así de bonito para mis cupcakes. Punto.


5.- lately I feel the need to have a typewriter. And of course, write.
Últimamente siento la necesidad de tener una máquina de escribir. Y por supuesto, escribir.


source

Hope you like this. Have a great week!

Espero les haya gustado. ¿hay algo que quieran probar últimamente?
Tengan una hermosa semana :3

- C

Tuesday, June 25, 2013


Tutorial, shorts de mezclilla con decoraciones
DIY jean shorts with personal decorations

¡Hola! Hoy les tenemos un post muy especial con una invitada, hace mucho que no hacemos un post invitado y nos encanta. En este caso es un tutorial y lo hizo nuestra amiga Nia, ella tiene su propia marca de ropa Nia Clothes (y nos va a contar un poquito de ella al final de post, por favor léanlo y denle like a su facebook), y vive en Cuernavaca como nosotras. 
En el tutorial de hoy nos va a enseñar como arreglar algo que ya tenemos en el closet y dejarlo listo para el verano  los dejamos con ella ;)

Hey guys! Today we have a very special guest, and we haven't had a guest post in a very long time, we're very excited! Her name is Nia, and she has her own line Nia Clothes (she writes a little bit about it at the end of the post, please check it out and visit her fb page ;), and today she's showing us how to update something everybody has in their closets and make it pretty for summer. We'll leave her to it!

- S & C

____________________________________________________________________________


You will need: An old piece of clothing ready to be modified, clothes paint, a sponge, an art-knife and a pen. Sorry we only have the instructions in Spanish but the pictures are pretty self-explanatory ;p


Hola! Soy Nia y desde hace poco más de un año comencé a crear mi marca Nia Clothes  (muy freelance el asunto). Desde que era muy pequeña soñaba con ser diseñadora de modas, la idea nunca se fue, así que con mis pocos conocimientos y mucha experimentación, fui adquiriendo con el tiempo las habilidades para hacer prendas.
Actualmente me inspiran algunas tendencias y estilos de vida que surgen en algunos países de Asia, donde las chicas andan por la vida todos los días como verdaderas muñecas y pareciera que no les cuesta ningún trabajo y es como si jugaran a interpretar a un personaje salido de cuentos de hadas; son chicas soñadoras y que muchas veces se sienten como si siguieran siendo niñas. Es una cualidad que también encontré en muchas chicas de México así que me decidí a interpretar esas propuestas y ofrecerlas tanto a las seguidoras de estas tendencias como a un público más general que tuviera gusto por lo romántico.
Dentro de poco, al fin, empezaré a estudiar la carrera de diseño y creación de modas, es por eso que Nia Clothes será capaz de evolucionar en calidad y propuesta.
Si aún no conoces mi página en Facebook te invito a que la visites, ahí encontraras todas las prendas que están disponibles. 


Los dejo con unas fotos de mi colección:

Hello, my name is Nia and a little more than a year ago I started my clothing line 'Nia Clothes'. It was all very freelance, but now I have the chance to study design and fashion and my line will be able to evolve into something more quality driven. 
I was interested in fashion since I was very young, and the idea never left my mind, I started to work without much knowledge, but with a lot of experimenting. 
I am inspired by some Asian tendencies, because I find that a lot of Asian girls dress up for everyday life and become real life dolls or fairy-tale characters almost. This is a childish quality that I admire, they are dreamers. I have also found some people that share this qualities in Mexico and my line is directed towards them, but also to new people that are not current followers of these tendencies but love romantic designs.
Please visit my facebook page, there you will find all the pieces that are available


I'll leave you with some photographs of my collection


--Nia


Thursday, June 20, 2013


Fabrics and ribbons (the thing about ribbons is that I need to get some matte ones because I'm over the shiny ones, so I'm using a piece of fabric instead :)
I'm afraid this isn't a proper tutorial and I'm not showing anything new, but I watched a movie the other day and the girl always fixes her hair with a ribbon and I thought "how cool and effortless!" So I got inspired and thought I'd share some things I've been wearing with my piece of fabric as a ribbon - I got it from a dress I bought a couple of years ago and asked for the leftover fabric when the store fixed the hemline for me, so now I have a matching ribbon and dress - .

Telas y listones (lo que pasa con los listones es que no me gustan brillantes, así que en lo que me encuentro algunos mate, usaré una tela :)
Me temo que este no es un tutorial de verdad y no estoy enseñando nada muy nuevo, pero hace poco vi una película con una niña que siempre se amarra el pelo con un listón y pensé "que fácil y elegante y bonito" y me inspiró a probar un par de peinados usando este sobrante de tela como listón - lo conseguí cuando me compre un vestido y pedí que me subieran el dobladillo, les pedí que me guardaran el sobrante de la tela, así que ahora tengo un vestido que combina jaja) -.


The first is a simple top bun, but I really like it with a ribbon or piece of fabric wrapped around, I've worn it without a bow, just making a knot and letting the ends hang and I like it even more! 

The second one is the easiest and cutest, put the ribbon through a hairband and when you make a side ponytail with it, the ends of the ribbon should be hanging at the sides, I tied them around a couple of times.

And the last one looks awesome with something more flashy! (I want to get a sequined headband, I lost one that had metal thingies :'( I divided the front part of my hair in three parts, pinned the middle of the ribbon secure at the roots and braided the hair along with the ribbon. I regularly took pieces of hair from around my hairline, like a kind of half french braid, but nothing very precise, I like it messy. Once I got to the other side y pinned the end of the braid along with the ribbon behind my ear. Done! 

En la primera foto nada más me hice un chonguito alto, pero me gusta mucho como se ve con la tela amarrada alrededor. Ya lo he usado sin moño sólo con un nudo y dejando que cuelguen las orillas y ¡creo que me gustá más!

El segundo es el más facil y lindo, para hacerlo pasa el listón por en medio de una liga y cuando te hagas una colita de caballo (yo me la hice de lado) las orillas colgaran a los lados, yo les di un par de vueltas y lo amarré con un nudo.

Y el último se ve super bien si usas algo más llamativo (quiero una cosa para la cabeza con lentejuelas, tenía una con cositas de metal pero la perdí :'(  Lo que hice fue dividir en tres la parte de adelante del pelo y atorar con un pasador la parte de en medio del listón a la raiz del pelo agarrando el listón trencé agarrando pelo de arriba de mi frente (como una media trenza francesa, pero nada precisa, me gusta así dispareja), y cuando llegué al otro lado la atoré con un pasador detrás de la oreja. 

Have a lovely day!
¡Que tengan muy bonito día!
-S


Tuesday, May 28, 2013


Braid bun tutorial

This super easy tutorial was Vanessa's idea. Vanessa is the Ponycat's little sister if you don't know her, she has lovely hair, perfect for tutorials! Here are the steps (:

Este tutorial super sencillo fue idea de Vanessa, que es la hermana pequeña de las ponycats, por si no la conocen. Su pelo es hermoso y es perfecto para tutoriales ;) Aquí están los pasos:


1) Have a couple of hairpins and teeny tiny plastic hairbands ready
2) Use one small plastic hairband (we didn't have any but their are easier to hide!) and make a ponytail with a section of hair, we braided a small section above the ponytail it to make it look cuter, but that's entirely optional 
3) Braid the ponytail and secure the ends with another rubberband
4) Wrap the entire braid around the beginning of the ponytail making a spiral, forming a bun. Secure it with a hairpin.
5) Repeat the last three steps on the other side.
6) Done! You have a lovely half up-do, you can complete it to a full up-do if you continue to grab the rest of the hair in another braid.

1) Vas a necesitar pasadores y ligas pequeñitas de plástico
2) Haz una colita de caballo y amarrala con una liguita (nosotros no teníamos de plástico, pero las recomendamos porque son más faciles de esconder), en este caso trenzamos un poquito en la parte de arriba antes de hacer la colita para que se viera bonito pero eso es opcional.
3) Trenza la colita de caballo hasta las puntas y asegurala con otra liga.
4) Envuelve la trenza alrededor de donde empieza la colita de caballo haciendo un espiral hasta que llegues a las puntas. Se debe formar un chonguito, aseguralo con pasadores.
5) Repite los últimos 3 pasos del otro lado 
6)¡Listo! Así te queda con pelo suelto abajo, pero puedes recoger el resto del pelo en otra colita y hacer otro chongo como en las fotos de abajo.

I love the half up look but if you want to make it a little more elegant you can make a third bun (or as many buns as you like for that matter!), and place it below like we did or leave a little more space and line them up.
 A mi me encanta como se ve con la mitad abajo pero si quieres recogerlo todo y que se vea más elegante puedes hacer una trenza más y acomodar el siguiente chonguito más abajo, o dejar más espacio entre los dos primeros y colocarlos en línea. 


This hairstyle is super quick and simple, it looks a lot more complicated that it actually is. I hope you like it!
Este peinado es super rápido y fácil y se ve mucho más complicado de lo que es. ¡Espero que les guste!

Have a great week!
¡Que tengan bonita semana!
-S


Sunday, May 19, 2013

Tenis Bordados
tutorial


Uno de nuestros temas favoritos para tutoriales es arreglar algo viejo o que ya tengas y no uses mucho, y mejorarlo para volverlo a usar. En este caso arreglamos unos tenis y eso nos ha inspirado para arreglar otros (¿Unos Keds tal vez?) les dejamos el video de como lo hicimos y si quieren aprender a bordar o conocer diferentes puntadas les recomendamos a nuestra amiga Rous que es una experta:
Su tutorial para aprender nudo francés:http://youtu.be/BeuJemTXn9M
Su canal: http://www.youtube.com/user/lluevediamantina/(suscribanse :)


¿Ya se suscribieron a nuestro canal (;?

¡Que tengan bonita semana!


Monday, March 11, 2013


DIY: Buttons in your hair


One of my favorite things to do in the world is to go to one of those craft stores where they have a bucket full of buttons, sorting through it and selecting beautiful buttons. I can really spend a lot  time doing this : p
I have many buttons and I often don't know what to do with them. So I thought it was time to use some of them, and so i thought of this little tutorial, hope you like it (;

Una de mis cosas favoritas de hacer en el mundo es ir a una de esas mercerías en donde tienen una tina llena de botones (10 x 3 pesos), sumergir mi mano y buscar botones hermosos. Puedo pasar realmente mucho tiempo haciendo eso : p
Tengo muchos botones y muchas veces no se ni que hacer con ellos, así que pensé que sería bueno darles un uso a algunos y así que pensé en hacer este pequeño y sencillo tutorial, espero les guste(;

  Lo que necesitan:

*Botones
*pasadores
*pistola de silicón

Select any button you like and glue it to the bobby pin. Done!

Toman el botón y lo pegan al pasador. ¡y listo! Más fácil no se puede : p


I really hope you like this idea and that you have an awesome day!

Espero les guste esta idea y que tengan un hermoso día(:

- C

Monday, February 25, 2013


A hair tutorial inspired from these photographs
Un tutorial inspirado en estas fotografías

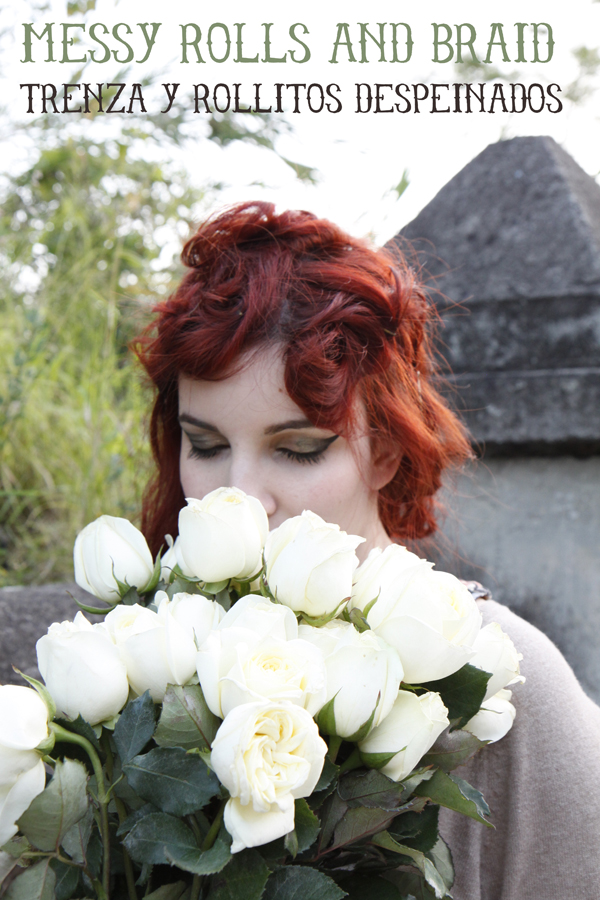
This may look to you as the most pointless hair tutorial in history -which it kind of is - because it is mostly a messy not very accurate hairstyle. But to be honest some people have asked my about the hair arrangements in my photo shoots before. Most of them are imperfect to say the least, and consist of braids, buns, some adornments and wavy hair. 
I don't own any hair appliances or know much about hair care, and if I were to start using perfect hair in my photos it probably wouldn't be the hair that's normally considered perfect. But hey, my idea of great hair is more Queen Amidala and less Kim Kardashian (or regular famous people), than most people's.

Here's the method to the madness in 4 easy steps :) I'm trying this new method, the drawing method:

Este tutorial es tal vez el tutorial menos útil en la historia, porque claramente es bastante desordenado y no tiene mucho sentido. Pero para ser sincera algunas personas me han preguntado por los peinados que hago en algunas de mis fotos. La mayoría son imperfectos y están hechos con chonguitos, trenzas y algunos adornos a veces y pelo ondulado. 
No tengo herramientas para peinar como secadoras y planchas y no se mucho de cuidados para el pelo, pero si empezara a usar peinados bien hechos en mis fotos probablemente no serían tan comunes porque en realidad mi idea de un buen peinado es más parecido a la reina Amidala y menos parecido a los peinados que veo normalmente que usan las personas famosas.

Aquí están las cortas instrucciones que esta vez intente hacer dibujadas :)


This is how the hair looks from the front. You can see the rest of the photographs here in my photography blog: Dig a Pony My model was of course Carmila and it was a short nice session. I've thought a little about doing a video of the make up tutorial for this look, but haven't quite gathered the courage to actually do it.
Así es como se ve el pelo por delante. Las demás fotos las pueden ver aquí, en mi blog de fotografía Dig a Pony . Mi modelo por supuesto fue Carmila y fue una sesión linda y corta. He estado pensando en hacer un video con el tutorial de el maquillaje que tiene en las fotos pero no he tenido el valor de grabarlo. 


And this is how it looks from the back.
Have a great week everyone :D
Y así es como se ve por atrás.
Que tengan una bonita semana :D
xoxo
-S

Thursday, January 31, 2013

How to put some color in your keys ;)
Como hacer que tus llaves sean coloridas

This was Diego's idea and it was because of him that I made this tutorial. The keychain above is his.

You know those cute keys that some locksmiths (I don't know if that's the right word), can make for you? Ones with leopard print, or bright colors and stuff? They are cute, but to be honest, if you have all your keys already and you don't want to spend money in replacing each one, here's a cheap (and changeable) alternative:

Este tutorial fue idea de Diego, hice el tutorial junto con él. La foto de arriba es su llavero.

¿Ven esas llaves que te pueden hacer en algunos cerrajeros, las que tienen estampados de leopardo, o de colores o flores? Están muy lindas, pero para ser sincera si ya tienes todas tus llaves hechas no dan ganas de tener que gastar en volver a hacer todas. Así que esta es una buena alternativa, muy barata y es reversible.

You will need: Keys, nail polish(es), tape.
Vas a necesitar: Llaves, barniz de uñas, cinta.


Done! You can paint them all over or just the top (if you paint it all over beware that it will cheap when you use it), but the cool thing is you can use nail polish remover and change them whenever you want. I also recommend using a transparent top coat so it lasts better :)

¡Listo! Puedes pintarlas completamente o sólo la parte de arriba (si la pintas toda se puede ir raspando cuando la metas en una cerradura), lo padre es que si las despintas con acetona puedes cambiarlas cuando quieras. Les recomiendo que le pongan una capa de barniz transparente al final para que dure más ;)


-S

Monday, December 24, 2012

How to make a gift box out of a piece of paper, 
super quick and easy.
Como hacer una caja de papel, rápido y fácil.
  
 This origami box is super easy to make and you can make it from any paper you have lying around, recycled or newspaper (I did that yesterday :) You can make just one open ended one and keep things in, or use to to use it as a gift box. If you are finishing you present wrapping late - like I am - this can be a useful little trick for small presents.
Esta cajita de origami es super fácil de hacer y se puede hacer con cualquier papel que tengas por ahí, hasta reciclado o periódico (yo hice eso ayer :) Y puedes hacer una sola sin tapa para guardar dos, o hacer dos y usarlas como cajita de regalo. Es ideal para regalitos pequeños, y si estas terminando de envolver regalos tarde (como yo), puedes usar esta idea.


After you get this grid from folding it, first horizontally then vertically, mark a square in the center of the grid (you can see below, the tiny dots I used as marks). Cut from the end of the paper towards the marks, vertically, following the line. You will have 4 slits. Fold them using the guide your folding has made as it's shown in the pictures.
Ya que estas en este paso y te quedó la cuadricula por los dobleces, marca un cuadro en el centro (en la foto de abajo se ven los puntitos que puse para marcarlo). Corta con unas tijeras, desde la orilla del papel hasta el punto, verticalmente, siguiendo la línea. Ahora debes de tener 4 cortes. Doblalos ayudandote de las marcas que se hicieron por los dobleces, se ve cómo en las fotos.

  
Done! Once you've folded all the corners in, the box should stand on its own. But you can tape it to make it a little more secure.
¡Listo! Ahora que ya están dobladas todas las esquinas debe de pararse sola, pero puedes usar cinta si quieres que quede más seguro.


If you make two boxes you can use one as the lid and one as the container. 
And it will end up looking like this :)

Si haces dos cajas puedes usar una de tapa y una de contenedor.
Y va a quedar algo como esto :)


 I hope you all have happy holidays and a happy Christmas. We send you ponycat hugs from where we are.
Espero que esten teniendo unas felices fiestas y muy feliz navidad. Les mandamos abrazos de ponigato desde donde estamos.
Xoxo
-S